16 Creative Halloween Nail Art Inspiration Ideas for Every Style
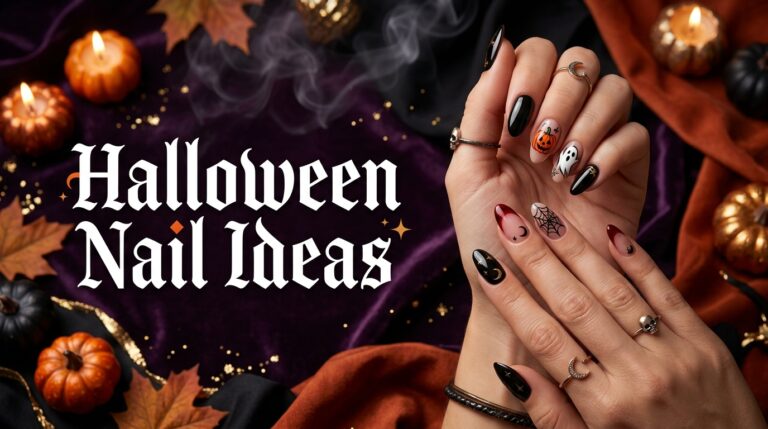
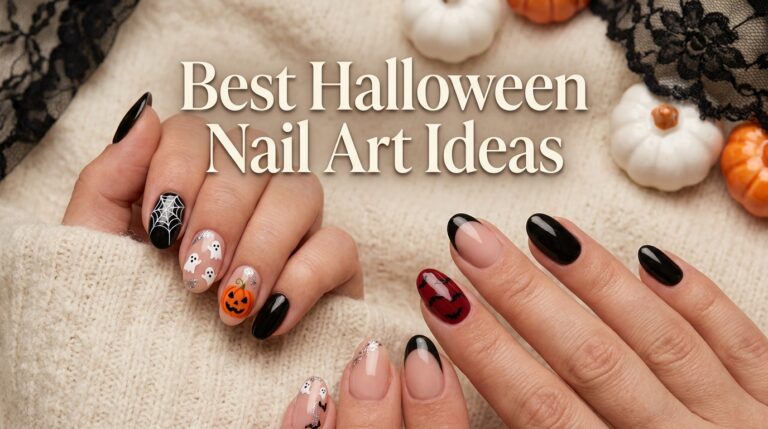
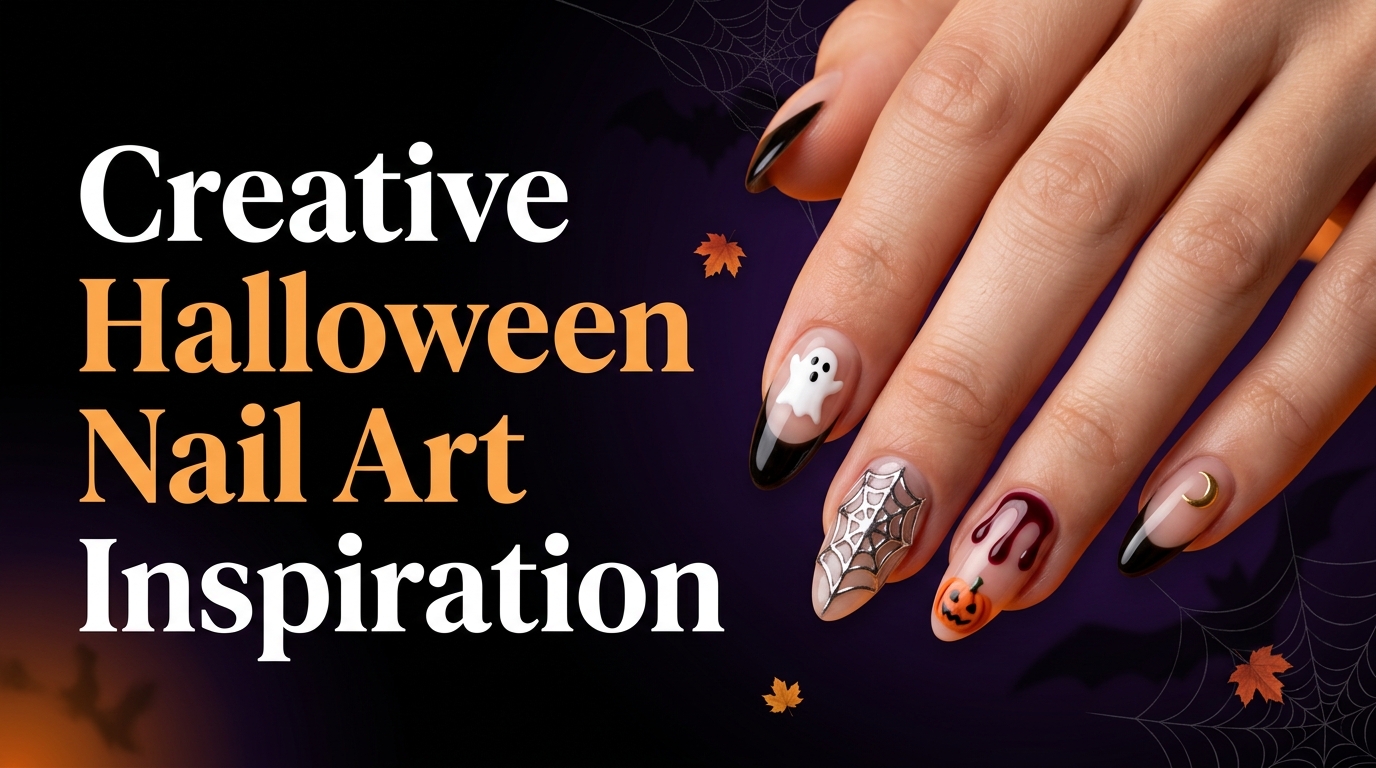
Halloween nails can be spooky, elegant, playful, dramatic, or surprisingly minimal. You do not need extremely long acrylic nails or complicated hand-painted artwork to create a seasonal manicure that feels special. A tiny ghost on a nude base, black chrome spiderwebs, deep red velvet polish, or pumpkin-colored French tips can instantly bring Halloween energy to your look.
This guide to 16 creative Halloween nail art inspiration ideas covers designs for short nails, almond nails, square nails, coffin nails, acrylic extensions, and natural gel manicures. Each idea includes practical color suggestions, nail shape recommendations, styling advice, and simple instructions you can share with your nail artist.
Whether you prefer cute Halloween nail art or a dark gothic manicure, the best design is one that fits your personal style and daily routine. Consider how long you want to wear the manicure, whether you need a work-friendly look, and how much maintenance you can manage before choosing your final design.
1. Minimal Ghost French Tip Nails
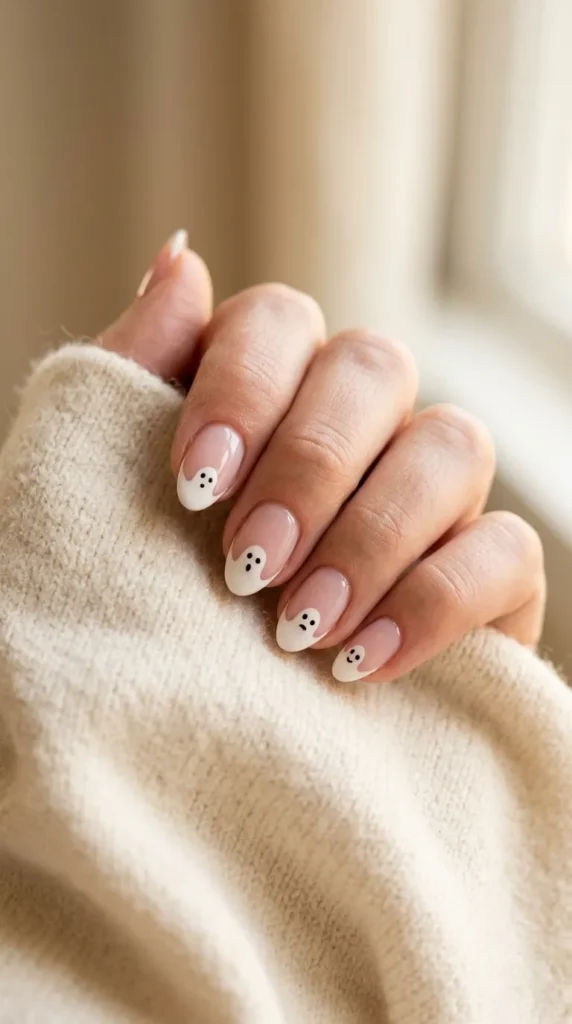
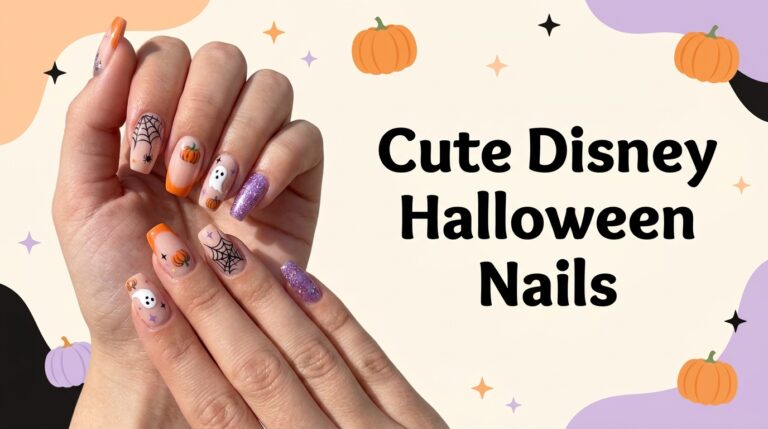
Minimal ghost French tips combine a classic manicure with a playful Halloween detail. Instead of creating a traditional white French tip, the white polish is shaped into small flowing ghosts. Tiny black dots form the eyes, while a sheer nude or pale pink base keeps the manicure clean and wearable.
People like this design because it feels festive without becoming too dramatic. It is especially suitable for students, office workers, minimal nail art lovers, and anyone who wants a Halloween manicure that can still match everyday outfits.
Ask your nail artist for a milky nude gel base with irregular white ghost-shaped tips. The ghost shapes should vary slightly from nail to nail so the manicure looks hand-painted rather than printed. You can keep every nail consistent or place ghosts on only two accent nails.
Short square nails and soft almond nails suit this design particularly well. A glossy finish makes the white artwork appear crisp, while a matte top coat creates a softer, more modern effect. Keep the eyes small and evenly placed to prevent the ghosts from looking cartoonishly oversized.
2. Black Chrome Spiderweb Nails
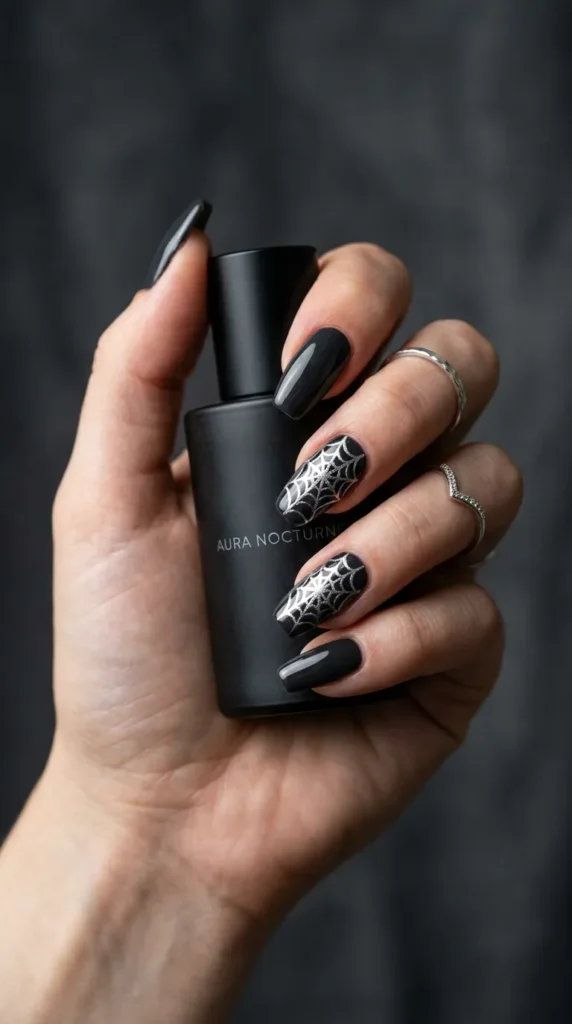
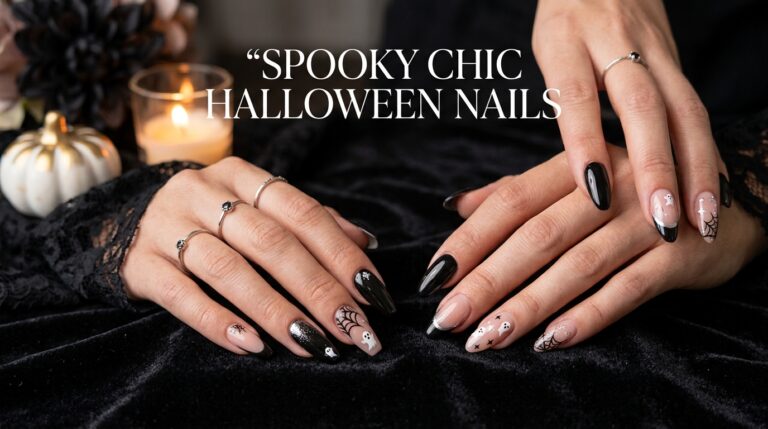
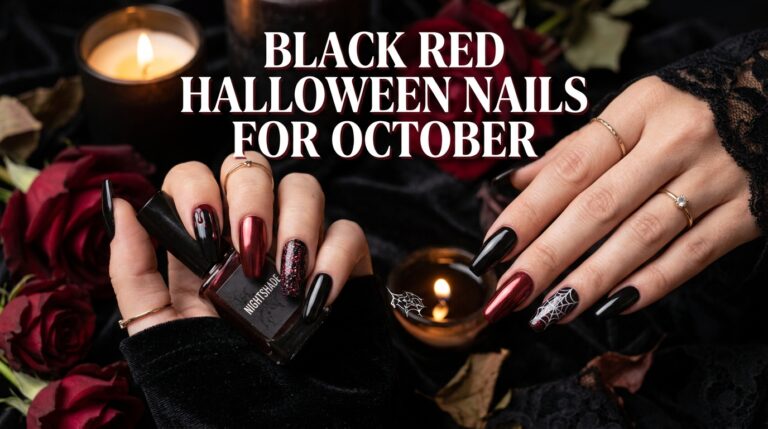
Black chrome spiderweb nails are designed for people who want a darker, more polished Halloween look. This manicure normally features a black, charcoal, or smoky grey base covered with silver chrome webs. The reflective finish catches the light and gives the design a stylish metallic appearance.
This idea is popular because it combines gothic nail art with modern chrome nail trends. It looks more sophisticated than brightly colored Halloween nails and works well with black clothing, silver jewelry, leather jackets, and evening outfits.
To create the look, apply black gel polish before adding thin spiderweb lines with silver gel paint. A chrome powder can then be rubbed over the cured web design. Ask your nail artist to use fine lines and leave some open space between the webs so the manicure does not appear crowded.
Coffin nails, almond nails, and medium-length square nails provide enough surface area for detailed web patterns. For a balanced manicure, use full webs on two nails and partial corner webs on the remaining nails. A small crystal spider can be added as an accent, but keeping the embellishments limited will preserve the clean chrome effect.
3. Pumpkin Spice Aura Nails
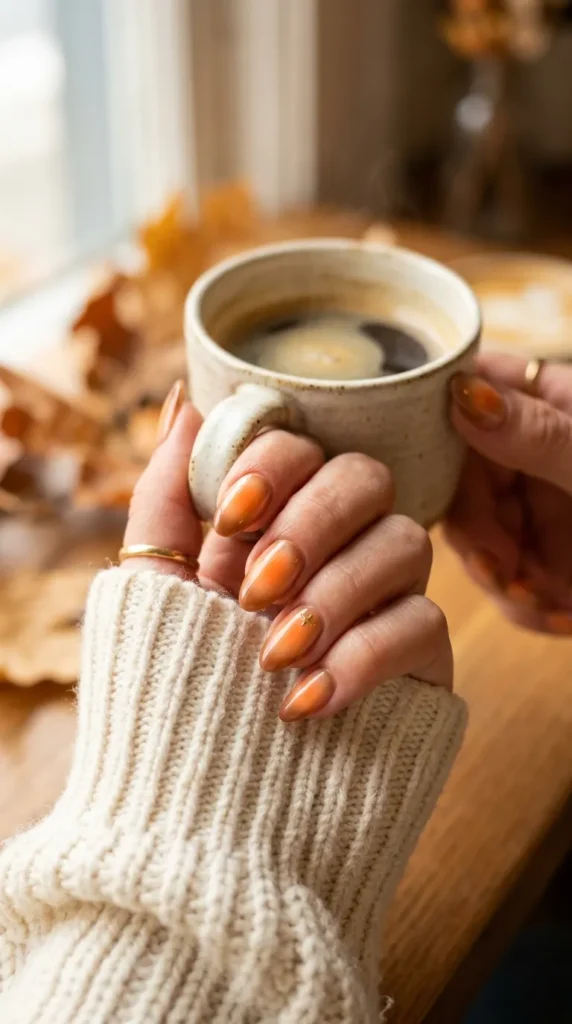
Pumpkin spice aura nails blend warm orange, caramel, brown, and golden tones into a soft glowing design. The center of each nail usually features a brighter pumpkin orange color that fades into a deeper brown or neutral shade around the edges.
People enjoy aura nails because the blended effect looks artistic without requiring detailed characters or symbols. The warm palette also makes this manicure suitable for the entire autumn season, not only Halloween night. It is an excellent option for anyone who prefers seasonal nails that feel stylish rather than costume-like.
Ask your nail artist for a nude, caramel, or chocolate base with an airbrushed orange glow in the center. A tiny pumpkin, gold star, or black crescent moon can be painted on one accent nail for a subtle Halloween connection.
Almond nails complement the soft circular gradient, while short round nails create a neat and natural version. A glossy finish makes the colors appear richer, although a velvet matte top coat can give the manicure a warm, powdery appearance. Pair the nails with gold rings and neutral clothing to highlight the orange tones.
4. Glossy Blood Drip Nude Nails
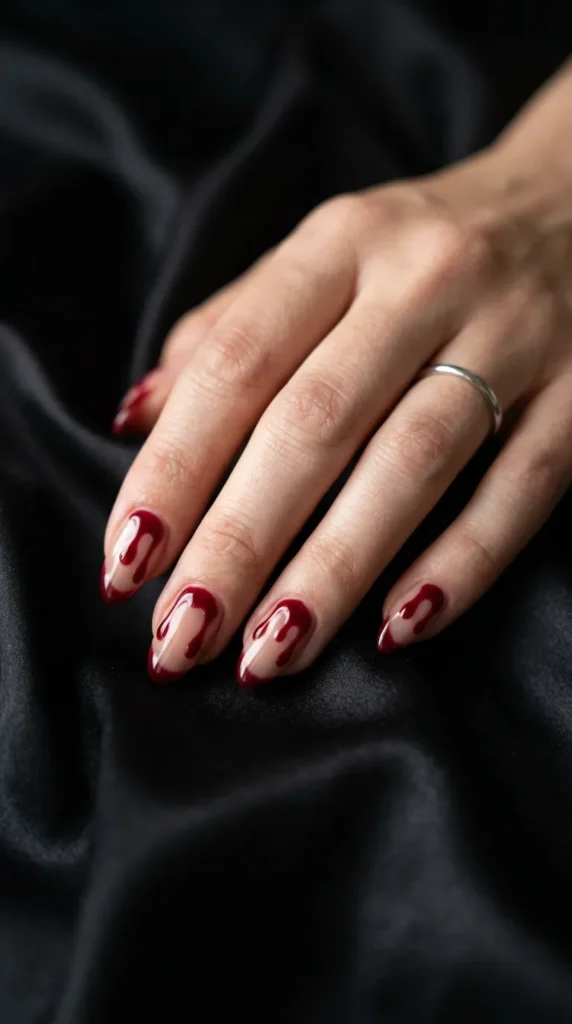
Blood drip nails use a nude or milky base with deep red polish flowing from the tip or cuticle area. Although the theme sounds dramatic, the design can look surprisingly clean when the red details are controlled and the background remains simple.
This style is popular because it creates an instantly recognizable Halloween manicure without requiring complex illustrations. It works well for horror fans, party looks, vampire costumes, and anyone who wants bold nail art that still feels fashionable.
For a polished version, choose a sheer nude base that closely matches your skin tone. Ask your nail artist to paint irregular red drips using burgundy, cherry red, or oxblood gel polish. The drips should vary in length, but they should not cover the entire nail.
Almond and stiletto nails make the design appear sharper and more dramatic. Short square nails create a cleaner, more practical version. A high-gloss top coat is essential because it gives the red polish a wet, realistic appearance. Avoid using an overly bright orange-red shade unless you want a more playful finish. Deep wine and dark cherry colors usually produce a richer result.
5. Cute Ghost Nail Art for Short Nails
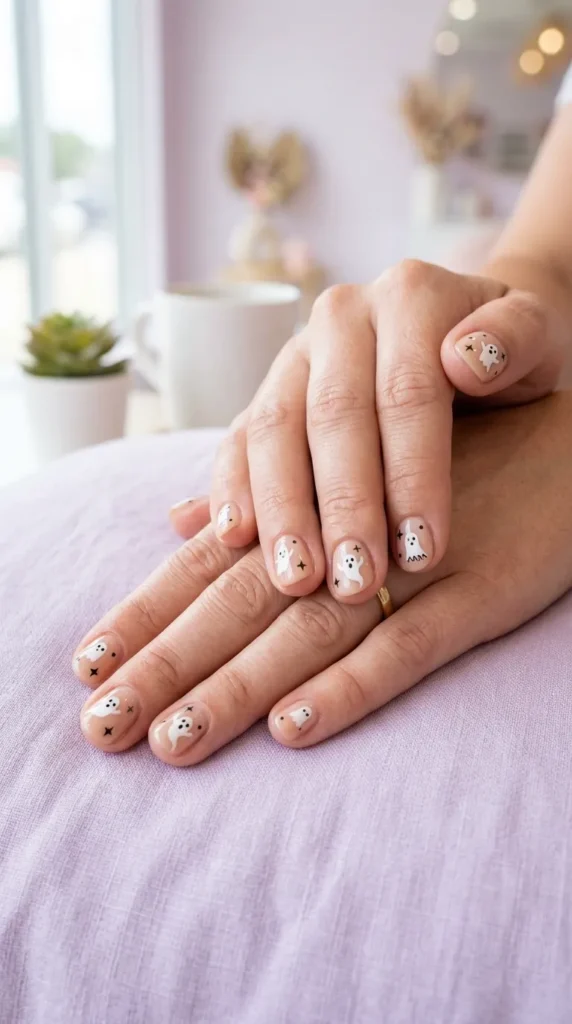
Cute ghost nail art is one of the easiest Halloween styles to adapt for short natural nails. The manicure usually includes small white ghosts, tiny stars, dots, hearts, or miniature pumpkins over a nude, pastel, or black background.
People love this style because it feels cheerful and approachable. It is ideal for anyone who does not enjoy frightening designs but still wants a recognizable seasonal manicure. The small artwork also fits comfortably on short round or short square nails.
To create the design, start with a sheer pink, beige, lavender, or pale grey gel base. Add one tiny ghost to each nail or keep the detailed artwork on two accent nails. Ask for simple rounded ghost shapes with small black eyes. Avoid adding too many facial details because they can become unclear on a short nail plate.
A glossy finish keeps the manicure fresh, while a matte background can make the white ghosts stand out more clearly. Use different ghost poses for a playful look, such as a waving ghost, a sleepy ghost, or a ghost holding a miniature pumpkin. Leaving visible space around each illustration helps the manicure appear neat.
6. Midnight Cat-Eye Magnetic Nails
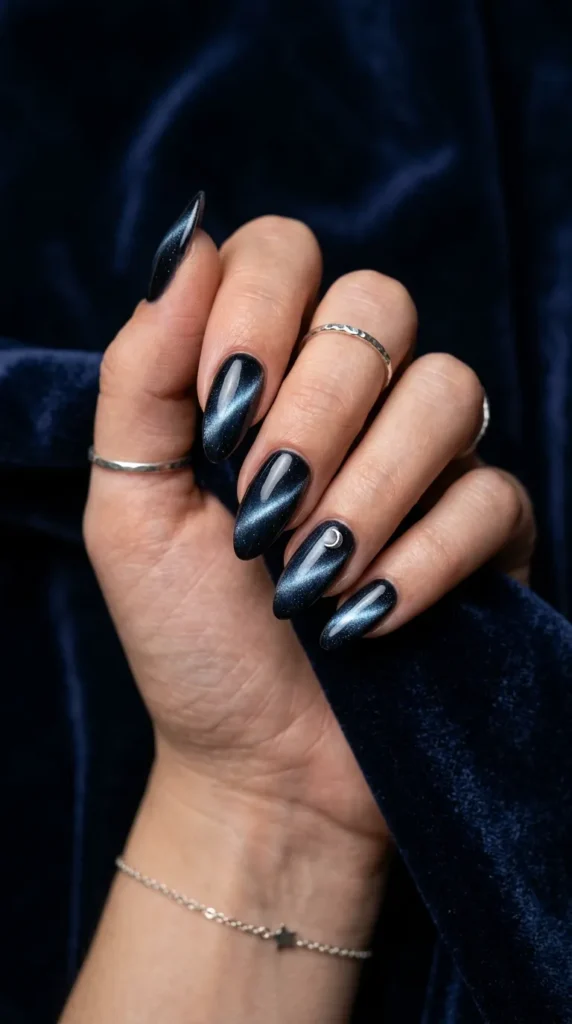
Midnight cat-eye nails use magnetic gel polish to create a glowing line that appears to move across the nail. Deep black, navy, emerald, or purple polish forms the base, while metallic particles produce a mysterious light-reflecting effect.
This manicure is popular because it looks detailed even without hand-painted nail art. The changing shimmer resembles moonlight, smoke, or a cat’s eye, making it naturally suited to a Halloween theme. It is best for people who prefer elegant seasonal nails, evening manicures, or designs that do not rely on cartoon characters.
Ask your nail artist for black magnetic gel with a silver, green, blue, or violet cat-eye effect. The magnet can create a diagonal beam, a central velvet glow, or a circular halo. For a stronger Halloween theme, add a tiny moon, black cat silhouette, or silver star to one nail.
Long almond and coffin nails display the magnetic movement beautifully, but the design also works on short nails. Apply cuticle oil regularly because dark polish makes dry skin more noticeable. A smooth, glossy top coat will protect the magnetic layer and enhance its reflective depth.
7. Skeleton Bone Nail Art
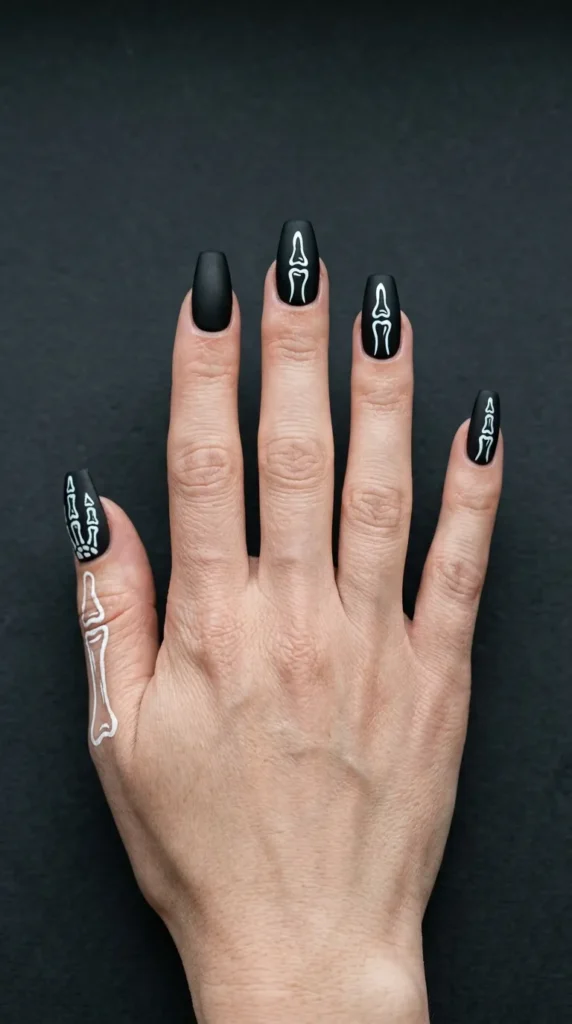
Skeleton bone nails feature white bone shapes painted over black, nude, grey, or transparent backgrounds. Some manicures show a complete skeletal hand across all five fingers, while simpler versions place one bone motif on each nail.
People like this idea because it offers strong Halloween impact without depending on bright colors. The black-and-white contrast looks graphic, modern, and easy to coordinate with clothing. It is particularly suitable for horror lovers, gothic fashion fans, and anyone wearing a skeleton-inspired costume.
For a detailed manicure, ask your nail artist to position the bones so they connect visually when your fingers are placed together. For a more wearable version, choose small bone fragments, skull accents, or simple white line work.
Medium or long coffin nails provide enough room for an extended skeleton design. Almond nails create a more elegant variation, while short square nails suit minimal bone patterns. A matte black base makes the white artwork appear bold and chalk-like. A glossy top coat creates a cleaner graphic style. Make sure the white lines are thick enough to remain visible but not so wide that they lose their shape.
8. Candy Corn Gradient Nails
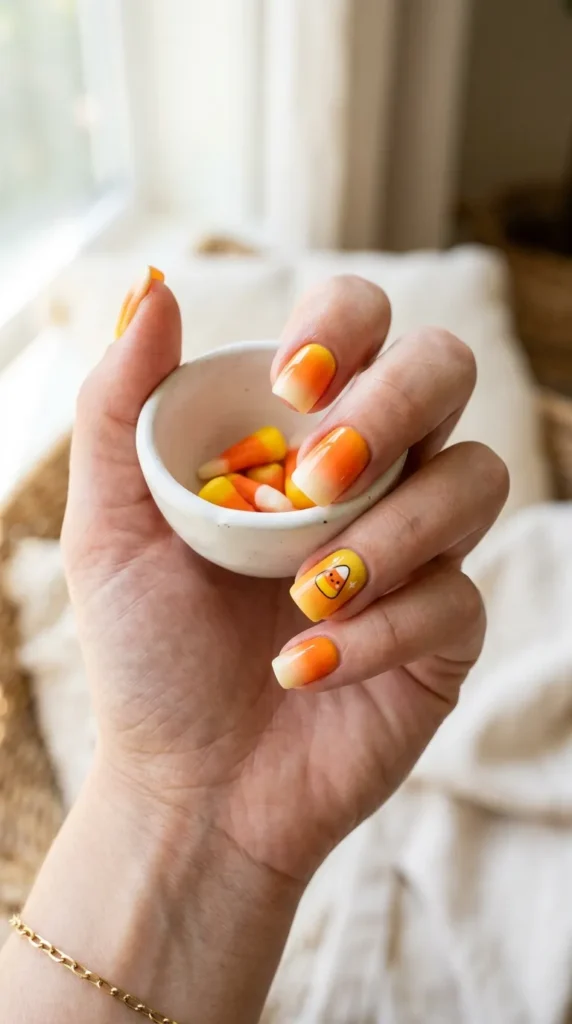
Candy corn nails use layers of yellow, orange, and white inspired by the familiar Halloween sweet. The colors can appear as horizontal blocks, soft ombré gradients, French tips, or tiny candy illustrations.
This design is popular because it feels bright, cheerful, and nostalgic. It is best for people who prefer cute seasonal nails rather than dark gothic designs. It also works well for family events, school celebrations, autumn parties, and simple at-home manicures.
Ask for a warm yellow base that blends into bright orange and finishes with a creamy white tip. A sponge can create the gradient, although an airbrush produces a smoother salon manicure. You can use the full color combination on every nail or combine gradient nails with orange French tips and small candy accents.
Short square and oval nails suit the classic striped design. Almond nails make the gradient appear softer and more modern. Choose creamy colors rather than fluorescent shades if you want a sophisticated result. A glossy finish will brighten the palette, while fine gold glitter between the color sections can add a subtle festive detail.
9. Witchy Moon and Star Nails
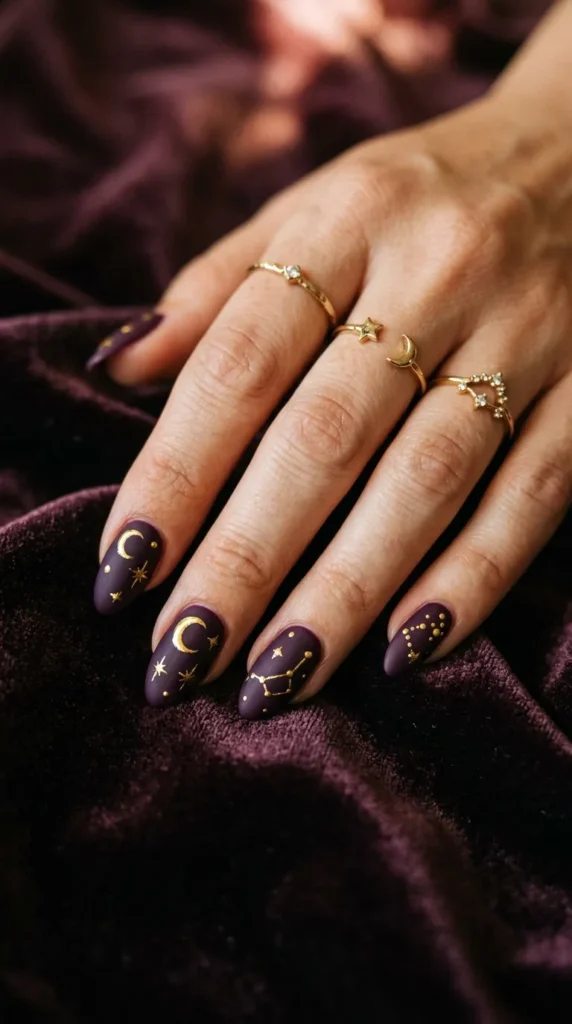
Witchy moon and star nails feature celestial details such as crescent moons, stars, constellations, clouds, and metallic dots. Common background colors include black, navy, plum, smoky grey, and deep green.
People enjoy this manicure because it creates a mysterious Halloween mood without using obvious horror symbols. It can be worn throughout autumn and works especially well for people who like celestial jewelry, astrology-inspired fashion, or elegant gothic nail art.
To create the design, apply a dark gel base and add gold or silver moon details using fine nail art brushes, stamping plates, or metallic decals. Ask your nail artist to vary the placement so every nail feels connected without appearing identical.
Almond nails enhance the graceful celestial theme, while coffin nails provide more space for constellations. Short nails can use one small moon or star per nail. A matte base with glossy celestial details creates an interesting contrast. Gold artwork looks warmer over burgundy, brown, or green, while silver artwork pairs beautifully with navy, black, and cool purple.
10. Black and White Striped Halloween Nails
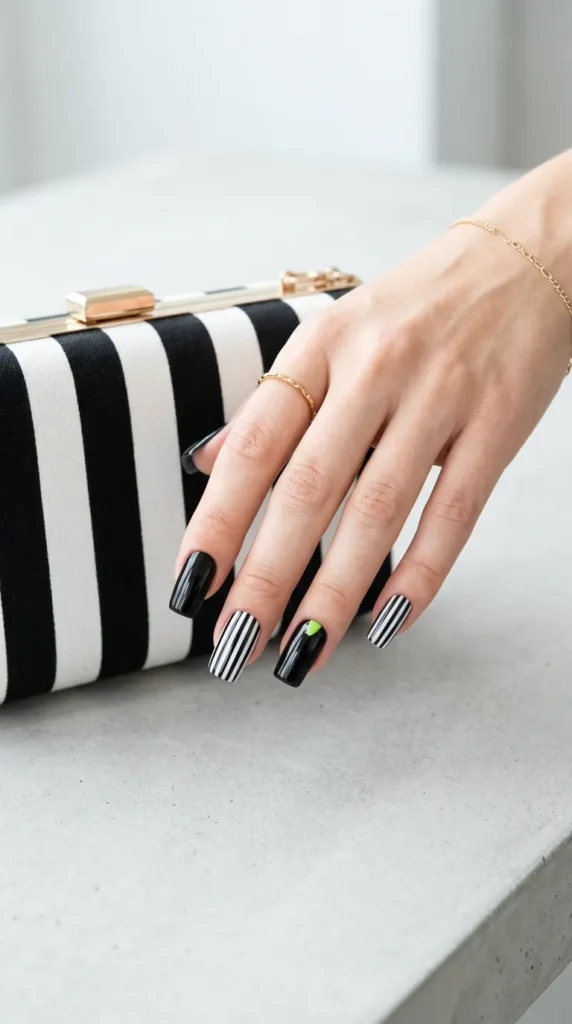
Black and white striped nails create a bold graphic manicure inspired by classic spooky patterns. The stripes can be vertical, diagonal, wavy, or combined with small pumpkins, ghosts, bats, and green accents.
This design is popular because it looks instantly dramatic while using only two main colors. It suits people who enjoy statement nails, striped clothing, bold accessories, and theatrical Halloween outfits. The pattern can also be adapted for a clean monochrome manicure without extra characters.
Ask your nail artist for thin, evenly spaced black and white stripes. Vertical lines can make shorter nails appear longer, while diagonal stripes create more movement. To prevent the design from looking too busy, use striped artwork on two or three nails and solid black polish on the others.
Coffin and square nails suit the structured pattern best. Almond nails work well when the stripes curve slightly with the nail shape. A high-gloss top coat gives the manicure a polished graphic appearance. For extra color, add a single lime green, purple, or orange accent nail rather than mixing several bright shades.
11. Deep Red Velvet Vampire Nails
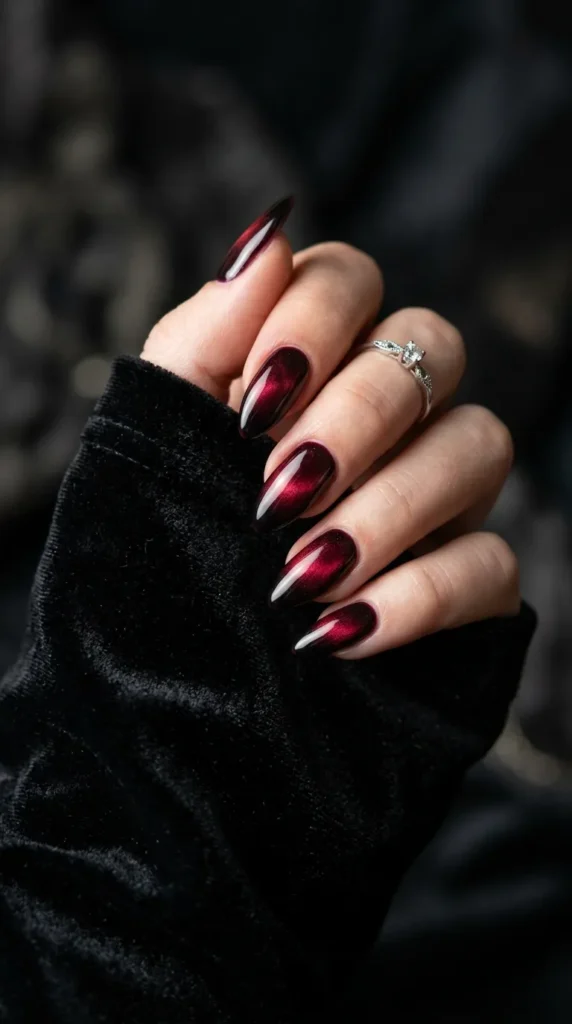
Vampire nails use deep red magnetic, velvet, jelly, or chrome polish to create a rich blood-red manicure. The color may appear almost black around the edges while glowing ruby red in the center.
People like this design because it feels glamorous, dramatic, and wearable beyond Halloween. It is a strong choice for people who prefer simple nails with an intense color rather than detailed seasonal illustrations. The manicure pairs beautifully with black outfits, silver rings, and evening makeup.
Ask for a dark burgundy base followed by red cat-eye or velvet magnetic gel. The reflective particles should be concentrated toward the center to create depth. A black gradient around the outer edges can make the red glow appear stronger.
Almond and stiletto nails enhance the vampire-inspired shape, although a short square manicure can look equally stylish. Keep all nails the same color for a luxurious finish or add one subtle fang, red crystal, or black French tip. Apply a smooth glossy top coat and avoid filing the surface after application because this can reduce the velvet effect.
12. Haunted House Silhouette Nails
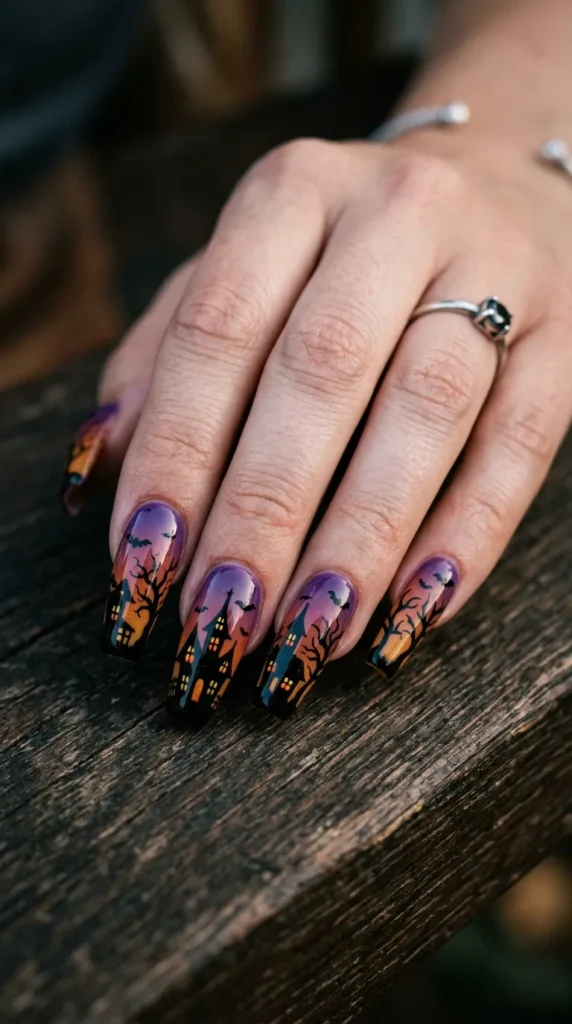
Haunted house nails show dark house shapes, bare trees, fences, bats, and glowing windows against an evening sky. The background may include orange sunset tones, purple mist, grey clouds, or a dark blue night gradient.
People are drawn to this style because it tells a complete visual story across the manicure. It is best for nail art enthusiasts, people attending themed events, or anyone who enjoys detailed salon manicures that become a conversation piece.
Ask your nail artist to create a blended sunset background first. The house and tree silhouettes should be painted afterward using black gel paint. Tiny yellow windows can make the scene appear illuminated. The complete landscape can continue across several nails, or one detailed haunted house can be placed on a single accent nail.
Long coffin or square nails offer the largest surface for architectural details. Almond nails suit softer landscapes with curved hills and flying bats. Use a glossy top coat to deepen the colors or a matte finish to create a painted illustration effect. Protect the artwork with two thin top-coat layers if the design includes raised details.
13. 3D Bat Accent Nails
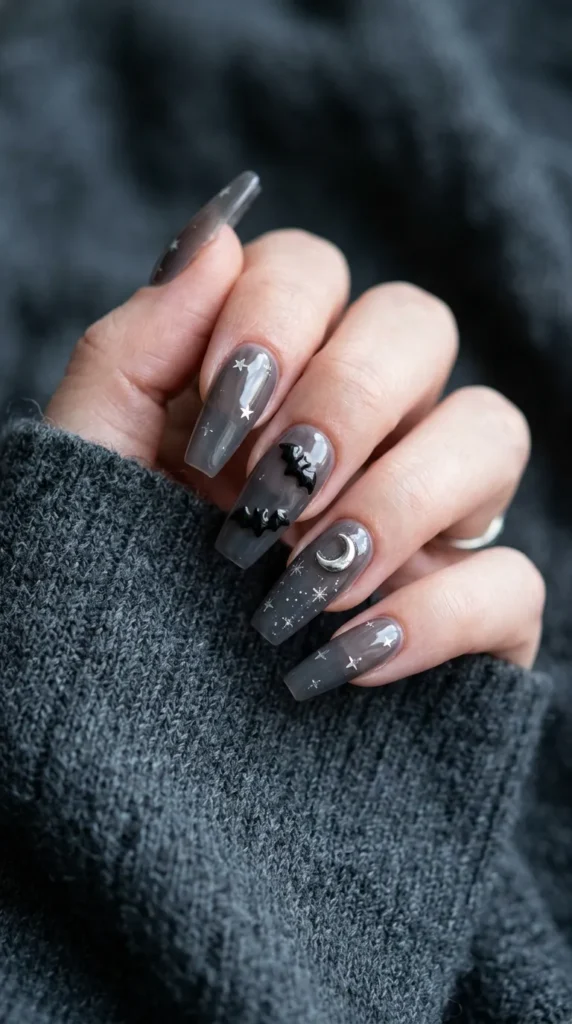
3D bat nails feature raised bat shapes created with sculpting gel, acrylic, charms, or carefully layered black gel polish. The remaining nails are usually kept simple with nude, black, purple, or smoky grey colors.
This manicure is popular because the three-dimensional details create texture and visual interest. It is best for people who enjoy statement acrylic nails, dramatic party manicures, or designs with charms and sculpted elements.
Ask your nail artist to place one or two small bats on accent nails rather than covering every nail with raised decorations. A translucent smoky base can make black bats appear as though they are flying through fog. Silver stars, tiny crystals, or a chrome moon can complete the scene.
Medium or long coffin nails give the bats enough space without making the nail appear crowded. Almond nails work well with smaller curved bat silhouettes. Raised decorations should be placed away from the cuticle and sidewalls to reduce catching. Use gloves when cleaning, and avoid using your nails to open containers because 3D charms are more vulnerable to lifting.
14. Mummy Wrap Nail Design
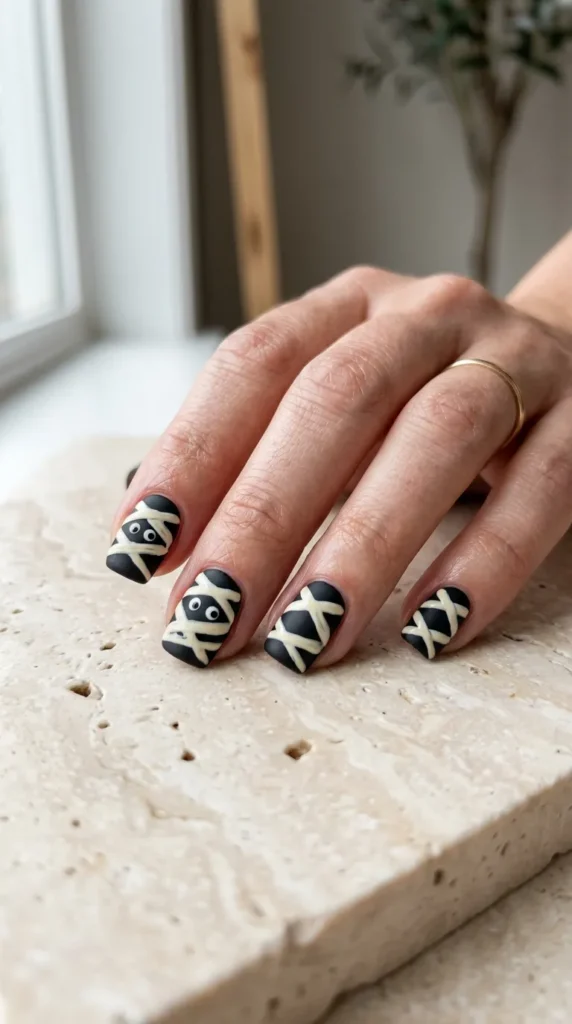
Mummy nails use white or beige bandage-like lines layered over a black, nude, or grey base. Small eyes often appear between the wraps, creating a cute or slightly spooky character design.
People like mummy nail art because it is recognizable, playful, and easy to adjust for different nail lengths. It works well for beginners, short nail wearers, and anyone who wants seasonal nail art without highly detailed painting.
To create the design, apply a dark base and paint irregular diagonal lines with white or cream gel polish. The lines should overlap slightly to resemble fabric strips. Add two small eyes between the wraps on one or two nails. For a softer look, use beige bandages over a milky nude base.
Square and round nails suit the compact pattern, while coffin nails allow the wraps to stretch across a longer surface. A matte finish creates a dry fabric effect, and a glossy finish makes the artwork appear cleaner. Keep some dark base visible between the bandages so the pattern remains clear. Avoid perfectly straight lines because slight irregularity makes the design more convincing.
15. Neon Green Slime Nails
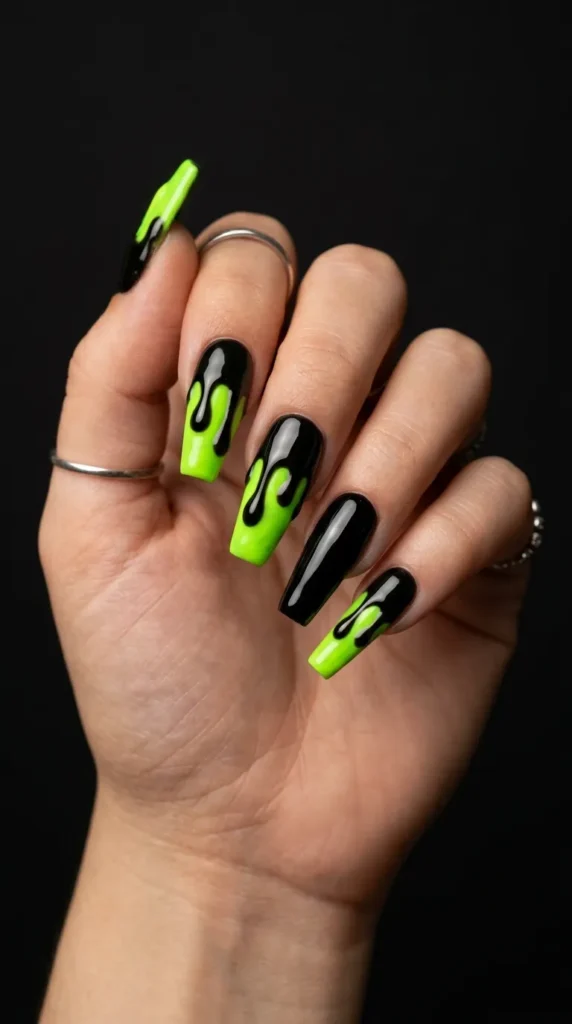
Slime nails feature neon green polish dripping over black, purple, nude, or transparent bases. The design may include glossy drips, glow-inspired color effects, bubbles, or chrome highlights.
This style is popular because it feels energetic, bold, and instantly connected to Halloween. It is best for people who enjoy bright nail art, costume parties, playful manicures, and high-contrast colors.
Ask your nail artist for a solid black or sheer nude base with green slime dripping from the tips. The drips should have rounded ends and different lengths. A small amount of lighter green or white can be added along the edges to create dimension. For a more modern finish, request green chrome slime over a matte black background.
Coffin, square, and stiletto nails support the dripping shape well. Short nails can use a thin slime French tip instead of long drips. A glossy top coat strengthens the wet appearance, while black accent nails prevent the neon color from overwhelming the manicure. Keep the surrounding skin neat because bright green polish can highlight uneven edges.
16. Gothic Black Lace Nails
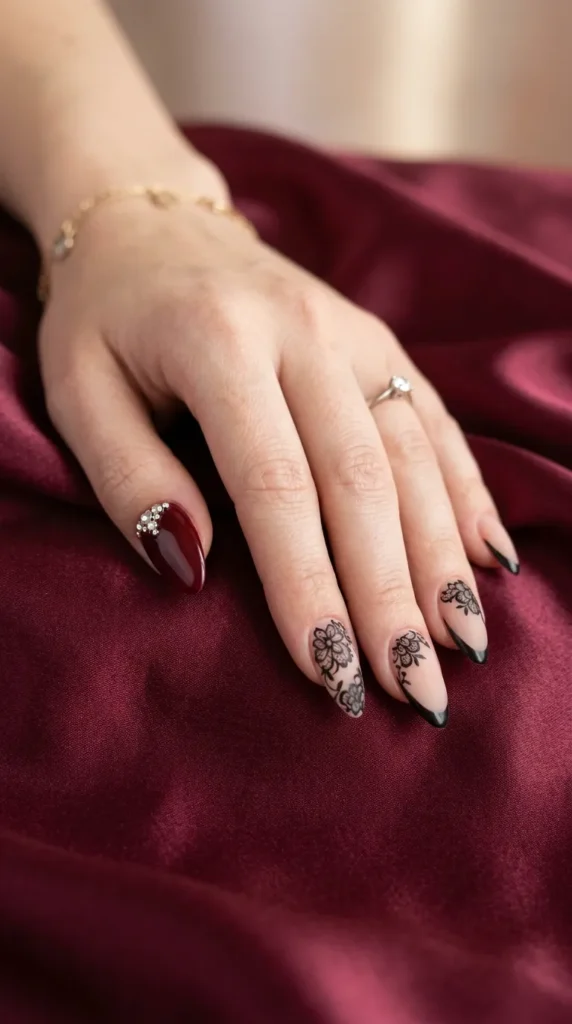
Gothic lace nails use delicate black patterns over nude, burgundy, red, grey, or transparent bases. Common details include floral lace, fine mesh, ornamental lines, black French tips, and tiny crystals.
People appreciate this design because it feels dark and seasonal without looking playful or costume-based. It is a strong option for formal events, autumn weddings, gothic outfits, and anyone who wants an elegant Halloween manicure.
Ask your nail artist for a sheer nude base with black lace stamping or hand-painted floral patterns. A black French tip can frame the lace, while one burgundy accent nail can add warmth. Fine patterns are important because thick lines may make the lace look heavy.
Almond and coffin nails complement the elongated ornamental style. Short square nails can use lace only along the tips or side edges. A matte nude base with glossy black lace creates a refined contrast. Limit rhinestones to one or two nails so they do not compete with the pattern. Daily cuticle oil will help keep the delicate manicure looking polished.
How to Choose the Right Halloween Nail Design
The right Halloween manicure should match your personal style, nail length, daily activities, and preferred level of maintenance. Start by deciding whether you want a cute, elegant, gothic, minimal, or dramatic result.
For a subtle manicure, consider ghost French tips, moon details, black lace, or pumpkin aura nails. For a stronger statement, choose blood drips, skeleton bones, 3D bats, haunted houses, or neon slime. Magnetic velvet nails and chrome spiderwebs are ideal when you want seasonal color without detailed character art.
Your lifestyle matters as much as your aesthetic. Short gel nails are practical for typing, childcare, cooking, and hands-on work. Long acrylic nails provide more room for detailed art but require careful maintenance. Bring two or three reference elements to your appointment rather than asking your nail artist to copy several complete designs. For example, request the color from one manicure, the shape from another, and the artwork placement from a third.
For more seasonal manicure inspiration, MSideas can help you compare styles before deciding which colors and details suit your next appointment.
Best Halloween Nail Color Combinations
A successful color palette helps separate a stylish seasonal manicure from a design that feels visually crowded. Black and orange remain classic because they create strong contrast and immediately communicate an autumn theme. However, many other combinations can produce a more personal result.
Black with silver works well for spiderwebs, chrome details, moons, stars, and skeleton artwork. Burgundy with black creates a romantic vampire-inspired palette. Purple with lime green feels playful and works particularly well for slime, witch, and monster designs. Nude with white creates soft ghost nails, while nude with deep red produces elegant blood-drip nail art.
For warmer seasonal nails, combine pumpkin orange with caramel, cream, chocolate brown, and muted gold. Avoid using too many strong colors in one manicure. Two main shades and one small accent color are usually enough. Your skin undertone can also guide your selection: warm oranges and golds flatter warm undertones, while plum, navy, silver, and blue-red shades complement cooler undertones.
Nail Shape Recommendations for Halloween Manicures
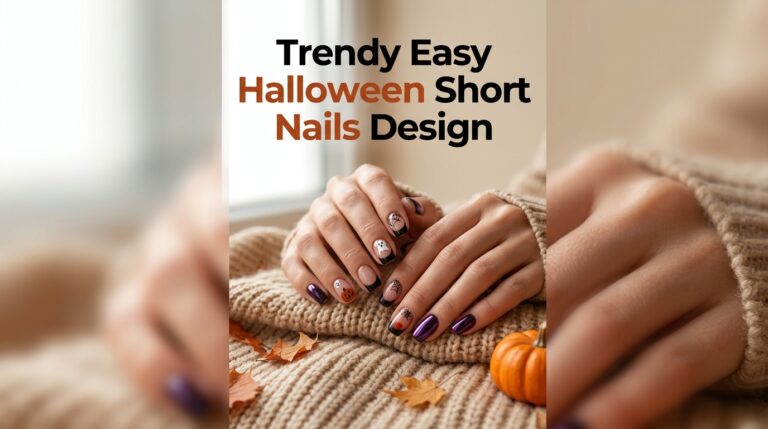
Nail shape influences how the artwork looks and how comfortable the manicure feels. Short square nails provide a neat surface for stripes, small ghosts, mummy wraps, French tips, and candy corn designs. They are also practical for people who prefer low-maintenance nails.
Round and oval nails create a softer appearance. They work well with cute ghosts, pumpkins, dots, stars, and simple seasonal nail art. Almond nails offer an elegant shape that suits celestial designs, gothic lace, cat-eye polish, chrome details, and blood drips.
Coffin nails provide a wide canvas for haunted houses, skeleton art, long slime drips, 3D charms, and detailed acrylic designs. Stiletto nails naturally complement vampire, witch, and horror-inspired manicures because of their pointed shape.
Choose the shape according to your natural nail strength and daily routine. A design should not require an impractical length to look attractive. Your nail artist can simplify detailed artwork for shorter nails by reducing the number of elements and using stronger, clearer lines.
Common Halloween Nail Art Mistakes to Avoid
One common mistake is adding too many themes to a single manicure. Ghosts, pumpkins, bats, webs, blood drips, and stripes may all look attractive separately, but combining every element can make the nails feel cluttered. Choose one main theme and one supporting detail.
Another mistake is selecting artwork that is too detailed for the nail length. Tiny haunted houses or complex skeleton designs can lose clarity on very short nails. Simplify the image or place detailed artwork on one larger accent nail.
Color balance is equally important. Bright orange, neon green, purple, red, and silver can compete with one another. Use neutral or solid nails between detailed designs to create breathing space.
Do not ignore practical maintenance. Large charms and 3D decorations can catch on hair or clothing, while extra-long acrylic nails may not suit every routine. Finally, avoid peeling off gel polish because it can remove surface layers from the natural nail. Book a proper removal or use a safe soak-off process.
How to Make Halloween Nail Art Look More Expensive
A polished Halloween manicure depends on clean application, balanced placement, and controlled detail. Start with a carefully prepared nail shape. Uneven edges or mismatched lengths can distract from even the most detailed artwork.
Choose a limited color palette and repeat small elements across the manicure. For example, use silver chrome on web details, one accent line, and a tiny moon. This repetition helps the design feel connected. Negative space also improves the finished look because it prevents every nail from feeling overloaded.
A sheer nude base can make ghosts, lace, blood drips, and black French tips appear more refined. Deep colors such as burgundy, plum, forest green, and charcoal often look richer than extremely bright shades. Apply thin polish layers to prevent bulkiness around the cuticle.
Finish with the correct top coat. A glossy finish suits chrome, blood effects, magnetic polish, and slime. A matte finish works beautifully with skeletons, mummy wraps, lace, and black graphic designs. You can also combine matte and glossy textures for a subtle luxury effect.
Halloween Manicure Maintenance Tips
Proper maintenance helps seasonal nail art stay glossy, smooth, and free from lifting. Apply cuticle oil at least once a day, especially after washing your hands or using hand sanitizer. Hydrated cuticles make the entire manicure look cleaner.
Wear gloves when cleaning, gardening, or handling strong household products. Water and chemicals can weaken the bond around gel polish, acrylic nails, and nail enhancements. Avoid using your nails as tools to open packaging, scrape labels, or press hard buttons.
If your manicure includes chrome powder, charms, crystals, or raised gel details, pay extra attention to the edges. Contact your nail artist if a charm becomes loose rather than trying to pull it off.
Most importantly, remove the manicure safely. Peeling gel polish or acrylic product can damage the natural nail surface. Once the design is removed, file the nails gently, use hand cream, and continue applying cuticle oil. Healthy natural nails create a stronger base for future seasonal manicures.
Frequently Asked Questions
What are the easiest Halloween nail designs for beginners?
The easiest designs include ghost dots, black French tips, simple spiderweb corners, candy corn stripes, mummy wraps, and small blood drips. These styles use basic lines, dots, or curved shapes rather than detailed illustrations. Beginners should start with one or two accent nails and keep the remaining nails in a solid coordinating color.
Can Halloween nail art work on very short nails?
Yes, Halloween nail art can look excellent on very short nails. Small ghosts, stars, dots, mini pumpkins, French tips, black cats, mummy eyes, and thin web details fit comfortably on short nail plates. Choose simple artwork with strong contrast so the details remain visible.
What is the best nail shape for Halloween nail art?
There is no single best shape. Square nails suit stripes, French tips, and graphic patterns. Almond nails work well for elegant gothic and celestial designs. Coffin nails offer more room for detailed scenes, while stiletto nails complement vampire and witch-inspired styles. Choose a shape that fits your natural nails and lifestyle.
Can I wear Halloween nails after October 31?
Many Halloween-inspired manicures can be worn throughout autumn. Pumpkin aura nails, burgundy velvet nails, black lace, celestial art, dark chrome, cat-eye polish, and warm orange French tips do not look limited to one specific date. Avoid overly literal characters when you want a longer seasonal wear period.
What colors are most popular for Halloween nails?
Common Halloween nail colors include black, orange, white, burgundy, purple, neon green, silver, and dark red. Neutral shades such as nude, beige, grey, and milky pink are often used as backgrounds. Chocolate brown, forest green, navy, and muted gold can create a more sophisticated autumn palette.
Are gel nails or acrylic nails better for detailed Halloween art?
Both can support detailed nail art. Gel polish is suitable for natural nails and shorter extensions, while acrylic nails can provide additional length and structure for complex designs. The better option depends on your desired length, nail strength, maintenance routine, and your nail artist’s preferred technique.
How long does a detailed Halloween manicure take?
The time depends on the nail length, extension method, artwork complexity, and number of decorated nails. A simple gel manicure with two accent nails will generally require less time than a full acrylic set with hand-painted scenes, chrome powder, and 3D charms. Ask your nail artist in advance so enough appointment time can be reserved.
How can I make Halloween nails look elegant instead of childish?
Use deeper colors, limited artwork, fine lines, and negative space. Burgundy, black, nude, silver, plum, and dark green create an elegant palette. Consider black lace, chrome webs, velvet magnetic polish, celestial details, or subtle ghost French tips. Keep cartoon faces and bright colors to one or two accent nails.
What should I show my nail artist at the appointment?
Bring clear reference images showing the color, nail shape, length, finish, and artwork placement you prefer. Explain which details are essential and which can be adjusted. It also helps to mention your work routine and maintenance preferences so the artist can recommend a practical length and technique.
How do I prevent dark Halloween polish from staining my nails?
Use a quality base coat before applying black, burgundy, purple, green, or red polish. A base coat creates a protective layer between the pigment and natural nail. Do not leave regular polish on for an excessive period, and remove it gently rather than scraping the surface.
Choose a Halloween Manicure You Will Enjoy Wearing
The most successful Halloween manicure is not always the most complicated one. It is the design that fits your nail length, style, schedule, and comfort. A detailed haunted house set may be perfect for a special event, while tiny ghost tips or deep red velvet nails may be easier to enjoy during everyday activities.
Before your appointment, choose one main design, two or three colors, your preferred finish, and a practical nail shape. Decide whether you want the manicure to feel cute, elegant, gothic, or dramatic. These simple choices will help your nail artist create a balanced result instead of combining too many competing details.